この記事では、ラズベリーパイにConda環境を構築していきます。
最終的に64bitのRaspberry Pi OSで「Miniforge」を導入してConda環境を構築しています
ラズベリーパイにConda環境を入れたい!
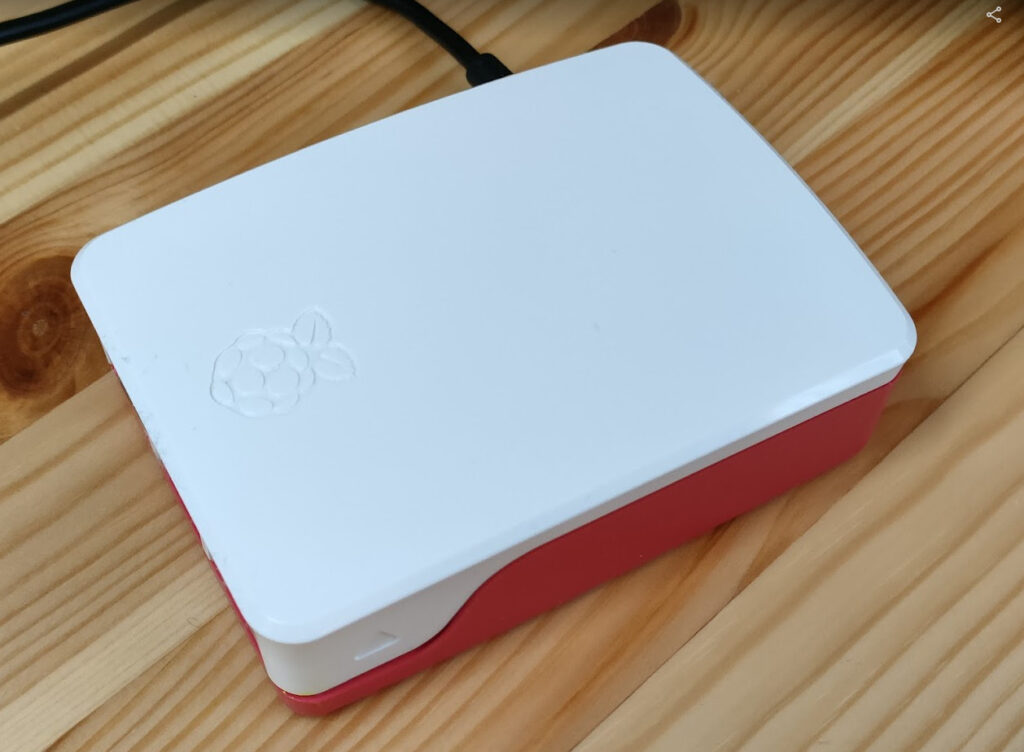
スイッチサイエンスで「Raspberry Pi 4 Model B / 4GB」のスターターキットを購入した私。
Pythonでプログラムを組むにあたり、Conda環境がほしいなと思いました。環境構築が楽だし、やはり使い慣れているし…。とそんな理由です。ま、venvとかそういう話も出てきましたが、やはりライブラリの依存性の問題なんかもCondaは一発で解決してくれるし便利だよね。
ところが検索してみると、どうも「スターターキットに付属する32bitのRaspberry Pi OS」にはAnacondaはインストールできない、ということがわかりました。
Berry Condaが鉄板だったが、現在は開発中止
そこで「32bit のRaspberry Pi OS」用に開発されたConda環境がBerry Conda(git hubのページはこちら)というのですが、こちらは
This project is no longer active, no recipes will be updated and no packages will be added to the
rpichannel.Please use issue #83 to discuss the future of the project.
https://github.com/jjhelmus/berryconda
つまり、もはや止まったプロジェクトです。Latestのリリースも2017年と古い。
It has been a long time since I’ve made any updates to this GitHub repository and it is time to make it official. Berryconda is no longer active, I will not be updating recipes nor uploading new packages in the rpi channel.
That said there seems to be interest from others in the community to continue building conda packages for the Raspberry Pi. Hopefully those who are interested will join the discussion in this issue and determine a path forward.
「このGitHubリポジトリに更新を加えてから長い時間が経ちましたが、そろそろ公式に更新する時期が来たようです。Berryconda はもはやアクティブではなく、私はレシピを更新することも、rpi チャンネルに新しいパッケージをアップロードすることもないでしょう。」(DeepLの訳)
と公式に書いてますから、どうも使う気になりませんでした。
とりあえずOSを64bitに変更
それで諦めてOSを64bitのRaspberry Pi OSにすることにしました。
32bitのOSが書き込んであるSDカード書き換えてもよかったんですが、なんとなく気が引けたので、新しくSDカードを買いました。1000円位で買えるのでお手頃。↓が私が購入したSDカードのアフィリエイトリンクです。


無事OSの書き込み完了し、普通に動きました。
Miniconda導入(失敗)
64bit OSにしたところでMinicondaの導入を試みます。結果からいうと、うまくいきませんでしたが、一応記録として残します。興味なかったら次のセクションを呼んでください。
公式ページにアクセスして
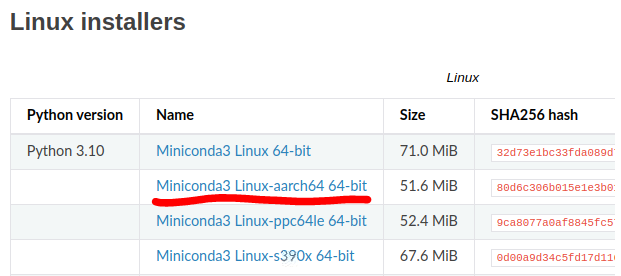
下線部をダウンロードして、
$ bash Miniconda3-py310_23.1.0-1-Linux-aarch64.shで実行します。
Welcome to Miniconda3 py310_23.1.0-1


In order to continue the installation process, please review the license
agreement.
Please, press ENTER to continue
ここはyes
Do you accept the license terms? [yes|no]
[no] >>> yes

Miniconda3 will now be installed into this location:
/home/tacoma/miniconda3

Press ENTER to confirm the location
Press CTRL-C to abort the installation
Or specify a different location below
[/home/tacoma/miniconda3] >>>
ロケーションはデフォルトのままで実行。
PREFIX=/home/tacoma/miniconda3
Unpacking payload …
Miniconda3-py310_23.1.0-1-Linux-aarch64.sh: 358 行: 1284713 Illegal instruction “$CONDA_EXEC” constructor –prefix “$PREFIX” –extract-conda-pkgsと、謎の「Illegal instruction “$CONDA_EXEC” constructor –prefix “$PREFIX” –extract-conda-pkgs」のエラーが出て終了。
同様のエラーはgithubのこちらのページでも報告されていました。
- Raspberry Piに入れたUbuntu OSでも同じエラーが起こる
- Raspberry Pi 3でも同様のエラーが起きる
- Miniconda3-py37_4.9.2-Linux-aarch64.shを使う(+α?)で解決
- 代わりにMiniforgeを使う人も
色々書いてありますが、わざわざ古いバージョン使うのも気が進まない。Miniforgeでできるなら、Miniforgeでやってみようと思いました。
Miniforgeの導入(成功)
Miniforgeを導入します。MiniforgeはMinicondaと似ていますが、インストールではAnacondaのデフォルトのチャンネルではなく、conda-forgeを使います。チャンネルが違うので、微妙に入っているライブラリに違いがあることがありますが、Linuxを使っていればそれほど困ったことはありません(個人の感想)。こちらのページから、下記赤線のインストーラを落としましょう。
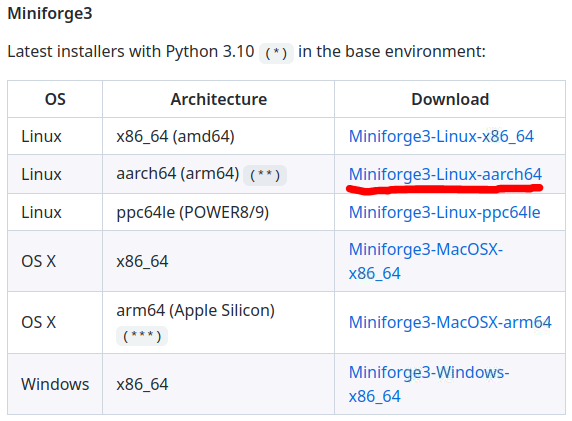
こちらをダウンロードします。
$ bash Miniforge3-Linux-aarch64.shで実行します。
Welcome to Miniforge3 22.9.0-3

In order to continue the installation process, please review the license
agreement.
Please, press ENTER to continue
ここで、ライセンスの確認し、Miniforgeをインストールする場所の確認。
Do you accept the license terms? [yes|no]
[no] >>> yes

Miniforge3 will now be installed into this location:
/home/tacoma/miniforge3

Press ENTER to confirm the location
Press CTRL-C to abort the installation
Or specify a different location below
[/home/tacoma/miniforge3] >>> /home/tacoma/minigorge3
以下はyesにしました。
Do you wish the installer to initialize Miniforge3
by running conda init? [yes|no]
[no] >>> yes
modified /home/tacoma/local/miniforge3/condabin/conda
modified /home/tacoma/local/miniforge3/bin/conda
modified /home/tacoma/local/miniforge3/bin/conda-env
no change /home/tacoma/local/miniforge3/bin/activate
no change /home/tacoma/local/miniforge3/bin/deactivate
no change /home/tacoma/local/miniforge3/etc/profile.d/conda.sh
no change /home/tacoma/local/miniforge3/etc/fish/conf.d/conda.fish
no change /home/tacoma/local/miniforge3/shell/condabin/Conda.psm1
no change /home/tacoma/local/miniforge3/shell/condabin/conda-hook.ps1
no change /home/tacoma/local/miniforge3/lib/python3.10/site-packages/xontrib/conda.xsh
no change /home/tacoma/local/miniforge3/etc/profile.d/conda.csh
modified /home/tacoma/.bashrc

==> For changes to take effect, close and re-open your current shell. <==

If you’d prefer that conda’s base environment not be activated on startup,
set the auto_activate_base parameter to false:

conda config –set auto_activate_base false

Thank you for installing Miniforge3!
うまくいきました!
.bashrcに以下のような記述が追加され、ターミナル起動時に自動でConda環境が立ち上がります。
>>> conda initialize >>>
!! Contents within this block are managed by ‘conda init’ !!
__conda_setup=”$(‘/home/tacoma/miniforge3/bin/conda’ ‘shell.bash’ ‘hook’ 2> /dev/null)”
if [ $? -eq 0 ]; then
eval “$__conda_setup”
else
if [ -f “/home/tacoma/miniforge3/etc/profile.d/conda.sh” ]; then
. “/home/tacoma/miniforge3/etc/profile.d/conda.sh”
else
export PATH=”/home/tacoma/miniforge3/bin:$PATH”
fi
fi
unset __conda_setup

<<< conda initialize <<<
あとは、conda createで仮想環境を作ったり、conda installでライブラリを導入するなり、煮るなり焼くなりしていただければOKです。
まとめ
- 32 bit のRasberry Pi OSには原則Conda環境は入らない。64bit OSに変更する
- 32bit OS向けにBerry Condaがあるが、現在は開発中止
- Minicondaのインストールはエラーが出るが、工夫すればできるかも
- Miniforgeならエラーなくスムーズに入る
以上、参考になれば幸いです。
コメント